
Want to try one of the most fun and diy projects easy that also adds charm to your home? Making a popsicle stick photo frame is the perfect budget-friendly craft to personalize your space or create a thoughtful handmade gift. With Artisanalhomes, your next DIY moment starts now.
1. Why This Is the Perfect Easy DIY Craft
If you're new to do-it-yourself diy projects, this one is a perfect place to begin. It’s simple, fun, and requires just a few basic materials—most of which you probably already have lying around your home. You won’t need any fancy tools or advanced crafting skills, making it an ideal weekend activity even for complete beginners.
Why this project stands out:
Beginner-friendly:
There are no complicated instructions or expensive equipment involved. All you need are popsicle sticks, glue, and a bit of imagination. Whether you're 10 or 60, this is one of those diy projects easy enough for anyone to try, even if you've never crafted before.
Affordable and accessible:
This photo frame is proof that you don’t need to spend much to create something beautiful. Popsicle sticks are incredibly cheap—or free if you're recycling—and most households already have basic glue or tape on hand. Add a printed photo, and you’re good to go!
Fully customizable to your style:
Whether you’re crafting a sweet photo frame for a nursery, designing a thoughtful handmade gift for a friend, or simply adding a cozy touch to your bookshelf decor, this project can easily be tailored to fit your aesthetic. Go Boho with neutral tones and tassels, Minimalist with clean lines and white paint, or Farmhouse with rustic touches like twine and distressed wood effects.

DIY popsicle stick plant holder base
Unlike bigger wood diy projects that require cutting and sanding, this craft is simple and satisfying. And once you make one, you’ll want to keep going. These small frames make perfect keepsakes, holiday gifts, or even DIY party favors.
2. Materials You’ll Need
Here's everything you need to start your craft:
-
8–10 popsicle sticks (plain or colored)
-
Hot glue or strong craft glue
-
Paint, markers, glitter, buttons, stickers (optional for decoration)
-
A small printed photo (2x3 inches works well)
-
Ribbon or magnets (optional for hanging or displaying)
Want to add more flair? You can also use lace, scrapbook paper, or dried flowers for a textured, layered design.
This is one of those diy crafts easy to do on a rainy afternoon, with kids, or even during a craft night with friends.

Popsicle stick
3. Step-by-Step: How to Make a Popsicle Stick Photo Frame
3.1. Step 1: Make the Basic Frame

Make a popsicle stick frame
Lay down four popsicle sticks in a square or rectangle. Two horizontal, two vertical—just like building a window.
Glue the corners where the sticks overlap. Press firmly and wait a few seconds for it to set.
For a sturdier look, you can double-layer the frame by adding another set of sticks diagonally or behind the first layer.
3.2. Step 2: Reinforce the Back
Once your popsicle stick frame is decorated and dry, carefully turn it over and glue a piece of thin cardboard or decorative craft paper to the back. This simple step helps secure your photo in place while also adding extra strength and stability to the frame, making it more durable.
If you want the option to change out the photo later, leave the top edge unglued to create a little pocket for sliding the picture in and out. If you prefer a more permanent display, glue down all four sides to keep the photo fixed firmly in place.
This small detail makes a big difference—it transforms your handmade creation into a keepsake-quality frame that’s not only functional but also lovely enough to display proudly on a shelf, hang on the wall, or place on your desk. It’s the final touch that makes your DIY project feel complete and meaningful.

Reinforce the Back
3.3. Step 3: Decorate the Frame
Here’s where your creativity shines! Paint the popsicle sticks before assembly if you want clean edges. Otherwise, paint and decorate once the frame is glued.
Try these decoration ideas:
-
Use diy painting ideas for walls as inspiration—like ombré, stripes, or polka dots.
-
Add glitter, stickers, or metallic markers for shine.
-
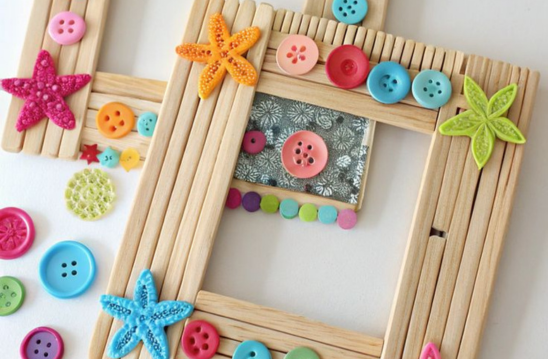
Glue on buttons, tiny shells, pom-poms, or dried flowers for texture.

Decorate the frame
Let your frame reflect your room’s theme, your personality, or the occasion you're crafting for. This is what makes it stand out among other diy projects easy.
3.4. Step 4: Attach the Photo
Trim your photo to fit within the frame opening. Slide it in or glue it directly onto the cardboard backing.
Want to keep it switchable? Leave one edge unsealed and use double-sided tape instead of glue.
This project is great for printed phone photos or instant prints from portable photo printers—perfect for mobile DIYers!
3.5. Step 5: Add Display Options (Optional)
Choose how you'd like to display your frame:
-
Glue a piece of ribbon at the top for hanging on walls or doors.
-
Add a magnet to the back for fridge decor.Attach a folded cardboard triangle to the back as a stand for shelves or desks.
These display options give your DIY a professional, store-bought look—without the price tag. It’s one of the smartest ways to approach diy projects home improvement in small doses.

How to Hang a Photo Frame on the Wall
4. Tips to Customize Your DIY Craft Easy
Make this craft truly yours with a few simple personalization tips:
Choose a Color Scheme
Pick paint colors that match your room’s palette or the personality of the person receiving it. For example:
-
Neutrals or white for Minimalist rooms
-
Earth tones for Farmhouse style
-
Bright pinks or pastels for kids’ rooms
Add 3D Elements
Glue on 3D embellishments to create depth and dimension:
-
Shells from your last beach trip
-
Faux flowers or leaves
-
Sequins or wood cutouts
These add texture and tell a story—perfect for capturing memories in your photo frame.
Use Scrapbook Paper as a Background
Instead of just plain cardboard, glue a piece of patterned scrapbook paper or fabric inside the frame for extra flair. It can highlight your photo or serve as a decorative background if you don’t have a picture to add yet.
This little touch transforms your project from simple to stunning and makes it a standout among typical diy woodworking projects.

Types of Popsicle Stick Photo Frames
This popsicle stick photo frame truly captures the spirit of diy projects easy—fun, affordable, creative, and perfect for any space. Whether you’re crafting solo or with friends, each frame tells a story. For more heartfelt ideas and weekend-friendly crafts, follow Artisanalhomes. And don’t forget to share your masterpiece—tag us and let others get inspired by your do-it-yourself magic!